I attended a Procedure seminar, so I’d like to share my experience. This blog is not meant to explain how to do Sutures. Please look that up on YouTube videos and similar resources — I’m sure you’ll find plenty!
Hands-on Procedure Seminar
Since procedures require actually working with your hands, I had been wanting to attend a “hands-on” course. With online courses, it’s hard to tell whether you’re actually doing things correctly.
When I suddenly decided to look into courses, the next available date turned out to be “tomorrow,” and there was exactly one seat left. Wow. There’s a Japanese proverb that says “the day you think of it is the best day to act,” and that’s exactly how it felt. I booked it immediately and decided to go.
About Conferences in General
When you attend something called a Conference, it typically includes a number of seminars packed in together. I love going to seminars, so I’d love to attend, but they’re generally too expensive for me. Also, conferences are often held at hotels and are set up so that people can combine them with a family vacation. Locations like Florida or Las Vegas are pretty common. However — and this is a bit sad — I personally have zero interest in that aspect, so I’m much happier when the venue is close enough to drive to from home.
Suturing Essentials
As a nurse, I occasionally have the opportunity to remove sutures that a surgeon has placed. In those cases, I read the surgeon’s detailed notes beforehand to understand what suturing method was used. However, having now sutured myself, I gained a much deeper understanding.
If I can perform sutures as an NP, then even for larger biopsies, I won’t need to ask someone else to handle the suturing.
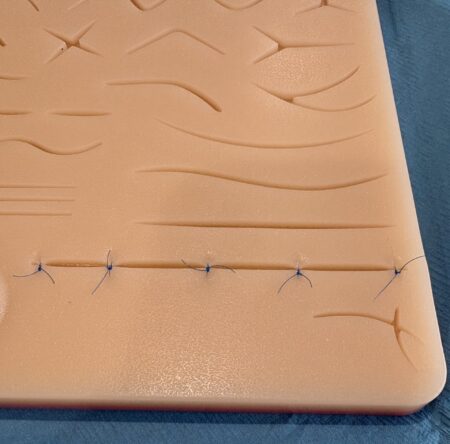
In the classroom, suture practice pads were distributed, and both thread and tools were provided.
- First, the instructor gives a diagram-based explanation along with a verbal walkthrough. At this point, the hand movements are completely over my head.
- Then, the instructor demonstrates it in real time, projecting the close-up view so everyone can see. Even at this point, it’s still a little confusing.
- Next, a video of another lead instructor performing the technique is played, and it loops continuously so we can keep watching as we practice.
- The instructor walks around to check on each person individually, offering tips and answering questions.
- In this way, about 3 or 4 different suturing methods are covered, and we continue practicing quietly or while chatting away.
My First Suture
The above image is my very first suturing. This is not good.
Instructor: “the line must be tightly closed. It’s wide open!” Yikes!
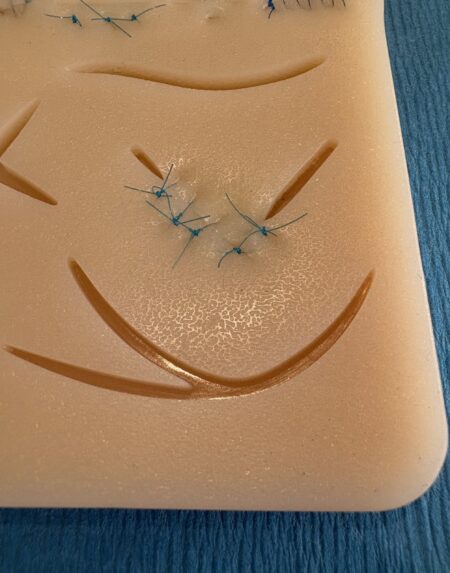
In the end of the course, my suturing skill improved and I could work on it faster.
Review of the course
I highly recommend the course. Here are my reasons:
- It doesn’t just teach you how to suture — it also deepens your understanding when it comes time to remove sutures.
- It’s a small class of around 10–15 people, so you can ask the instructor as many questions as you like.
- A complete set of necessary tools is included, so you can show up empty-handed. You also get to take the tools home.
- The price is around $500 per one day (3 days all together this time). That amount itself isn’t cheap, but compared to other courses, I think it’s reasonable. There are discounts if you purchase two or three days’ worth of seminars. I could not take all 3-day course. The first day was already sold-out. However, in such cases, I believe you can contact the office and ask if there is any cancelled spot. Sometimes, someone cancel it at the last minute.
- The provided lunch was delicious. Drinks were also available throughout the day.
- The instructor was a wonderful, warm person. I’m sure the other instructors are equally excellent.
Information of the Training Course
PRIMARY PROCEDURES – the website link